This post may contain affiliate links.
If you’re just getting into content creation, lighting can make or break your videos—especially for talking head videos, where you’re the focus. The good news? You don’t need to spend a fortune to get professional-looking results. In this guide, we’ll explore free and budget-friendly lighting setups that will instantly improve your video quality.
Whether you’re filming for YouTube, UGC (User-Generated Content), or video presenting gigs, these tips will help you make the most of what you have—or invest wisely in just the right gear.
1. Use Natural Light — The Free Lighting Hack
Let’s start with the most accessible option: natural light from a window. It’s free, flattering, and when used correctly, incredibly effective.

Here’s how to get the best results:
- Face the window so the light hits your face evenly.
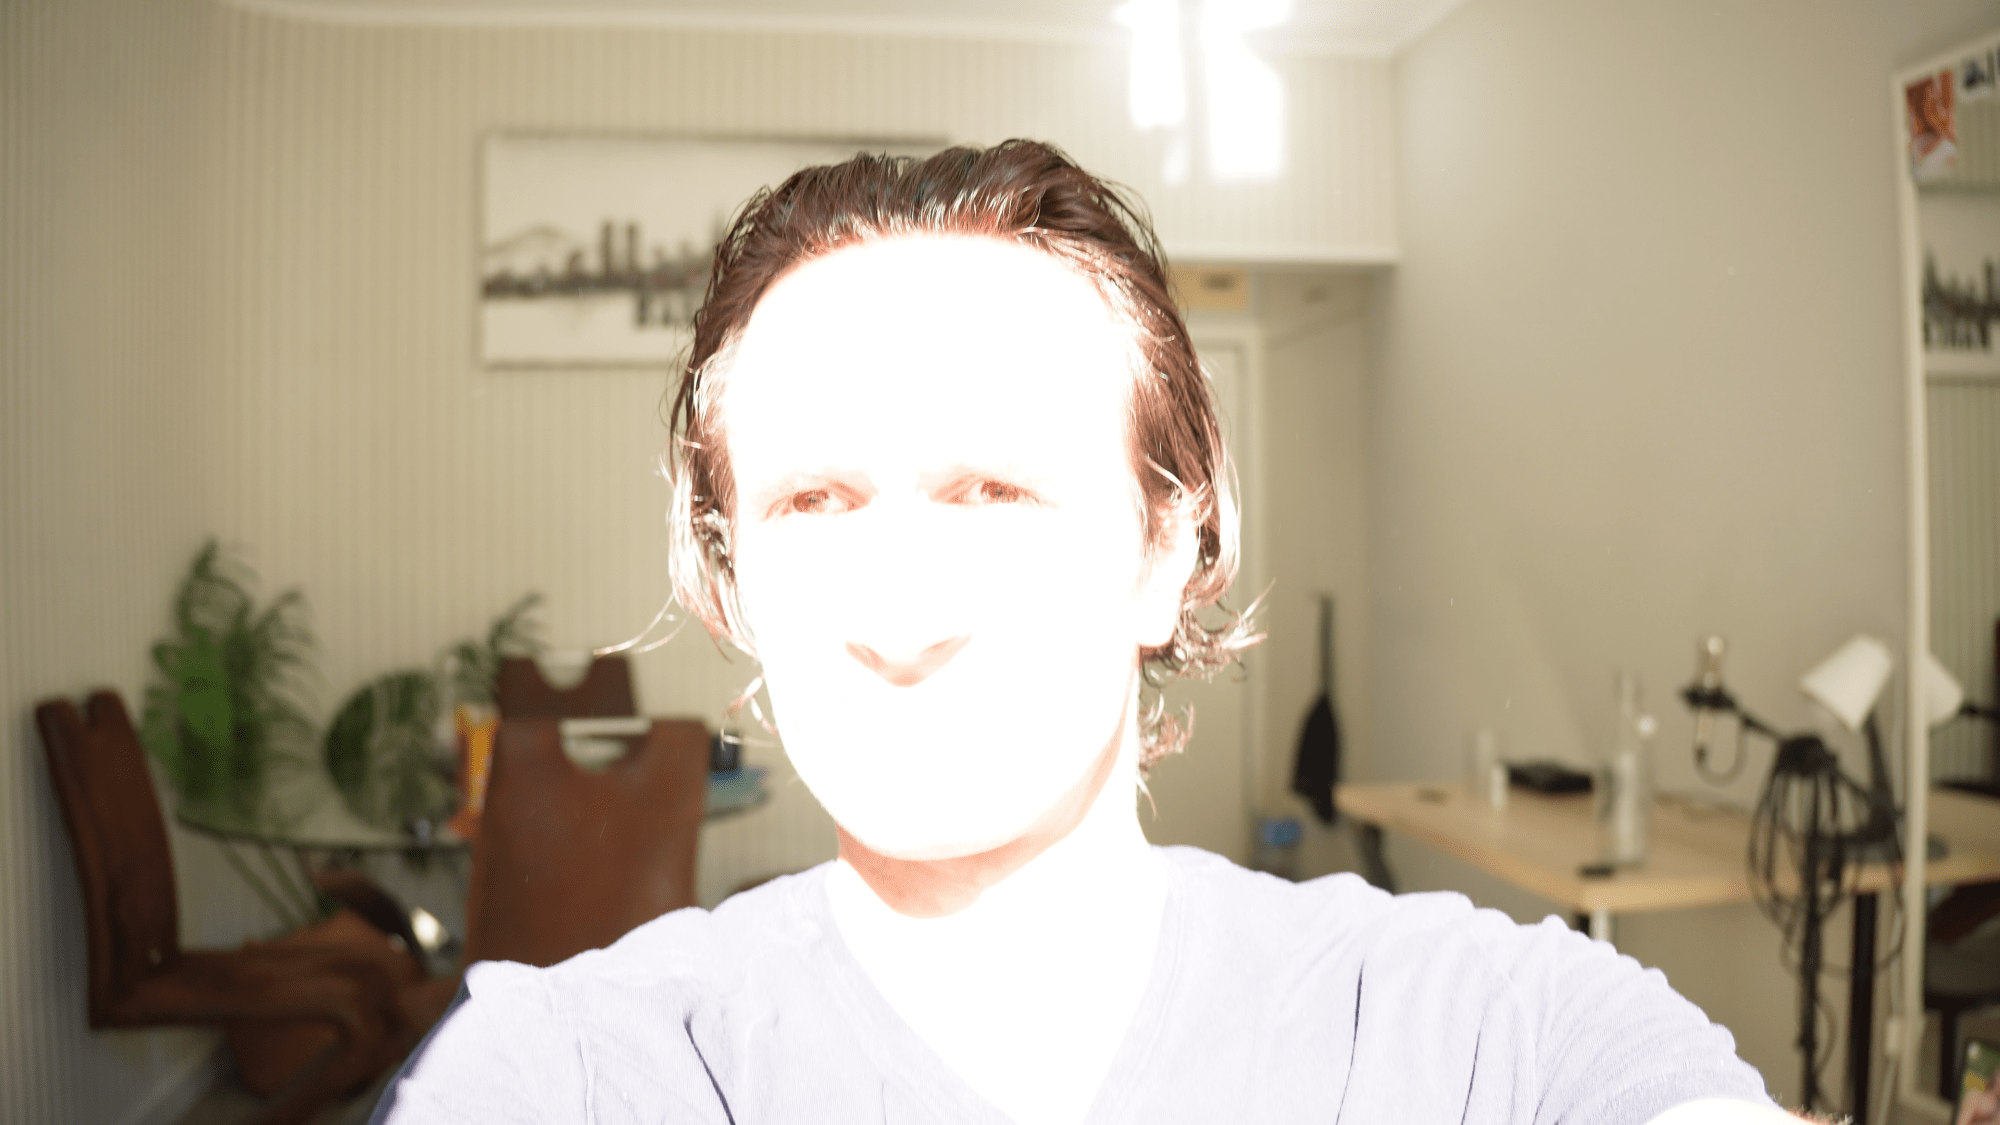
- Avoid direct sunlight—it’s often too harsh, creating sharp shadows and blown-out highlights, especially if your camera doesn’t handle dynamic range well.
- Cloudy days are ideal. The clouds act like a giant softbox, diffusing the light beautifully.
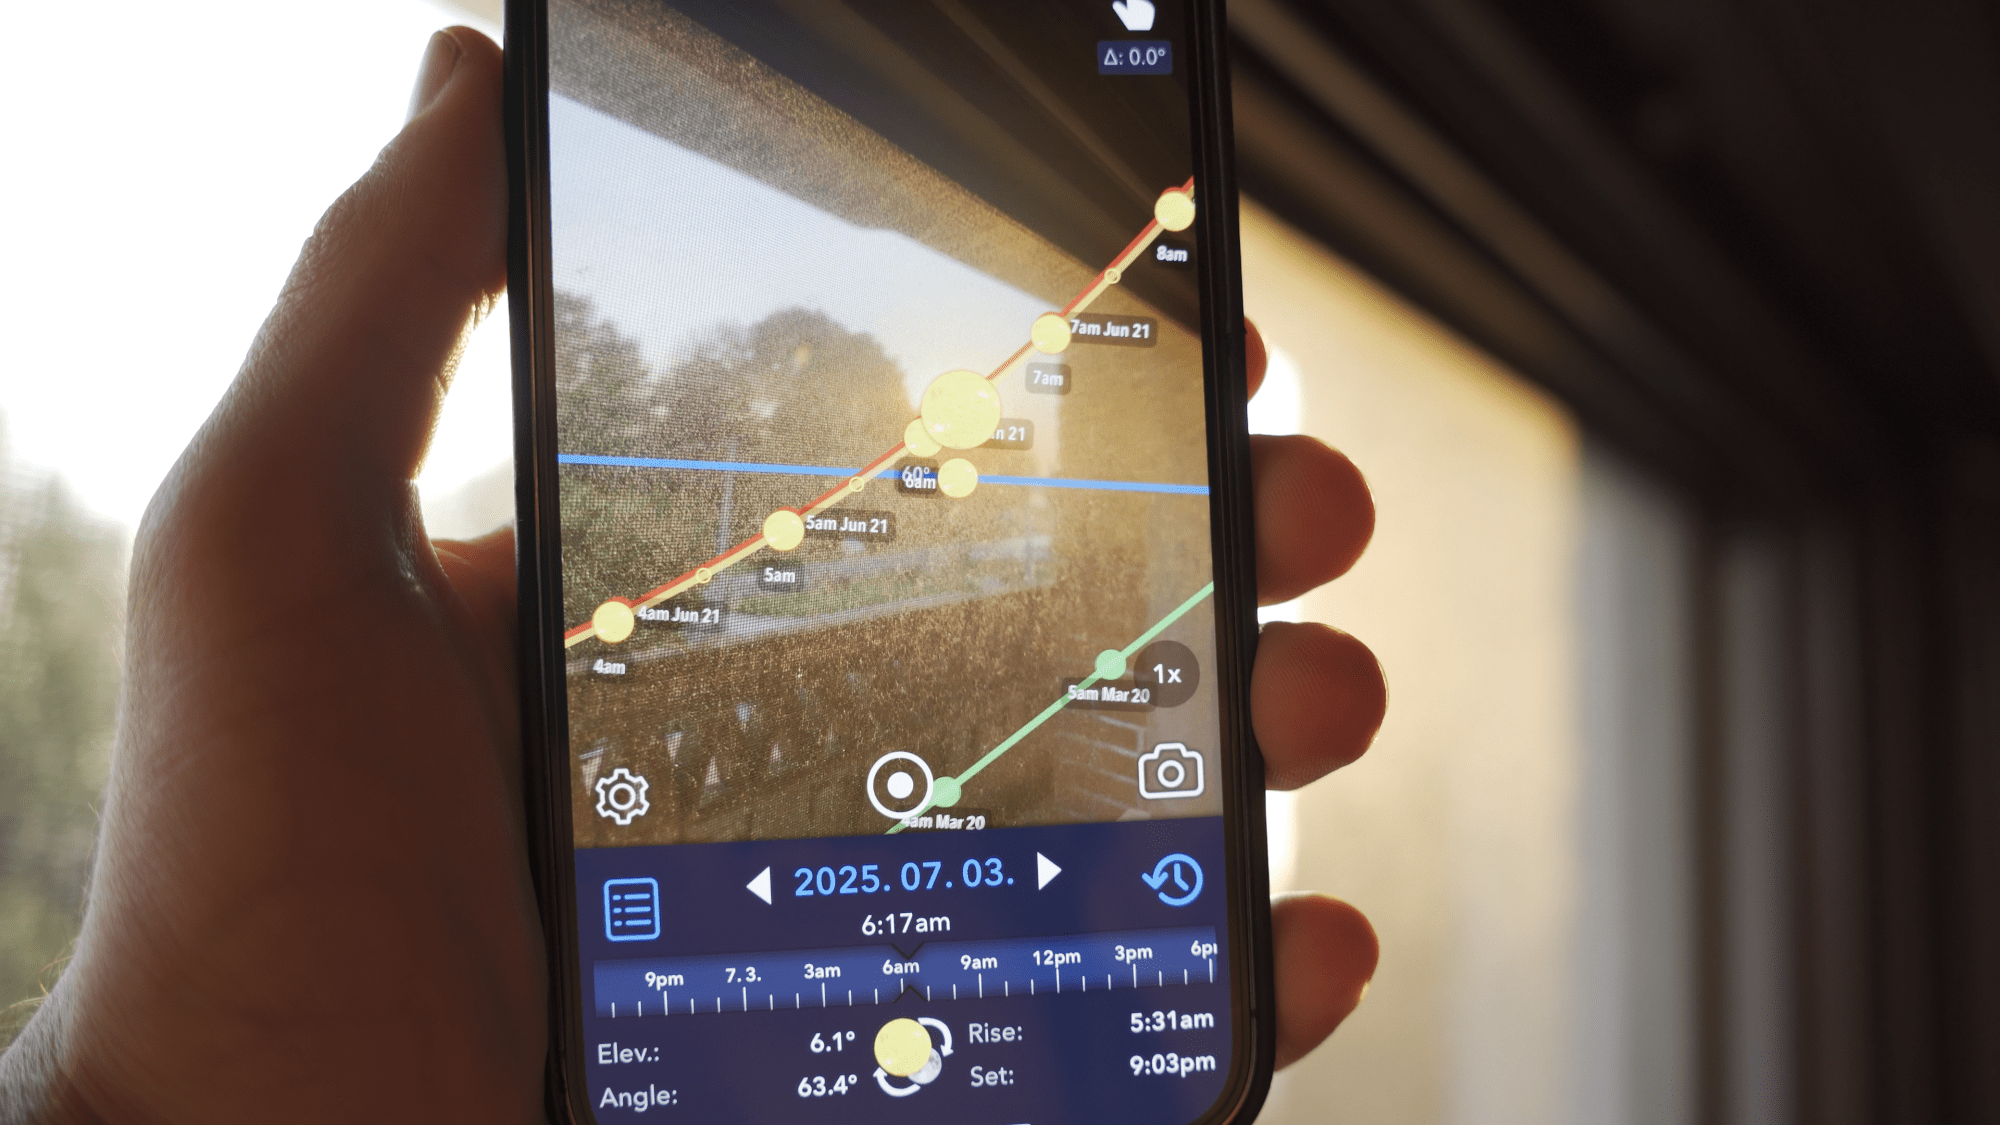
💡 Tip: Use a sun-tracking app like Lumos to check where the sun will be during your filming time, so you can avoid direct beams through the window.
Natural light is free, flattering, and still one of the best light sources—as long as you control it properly.
Before setting up your own lights, turn off all existing room lights. Overhead or side lighting from your ceiling lamps can clash with your key light and create mixed color temperatures, weird shadows, or uneven skin tones.
This simple step helps create a clean lighting environment you can control.
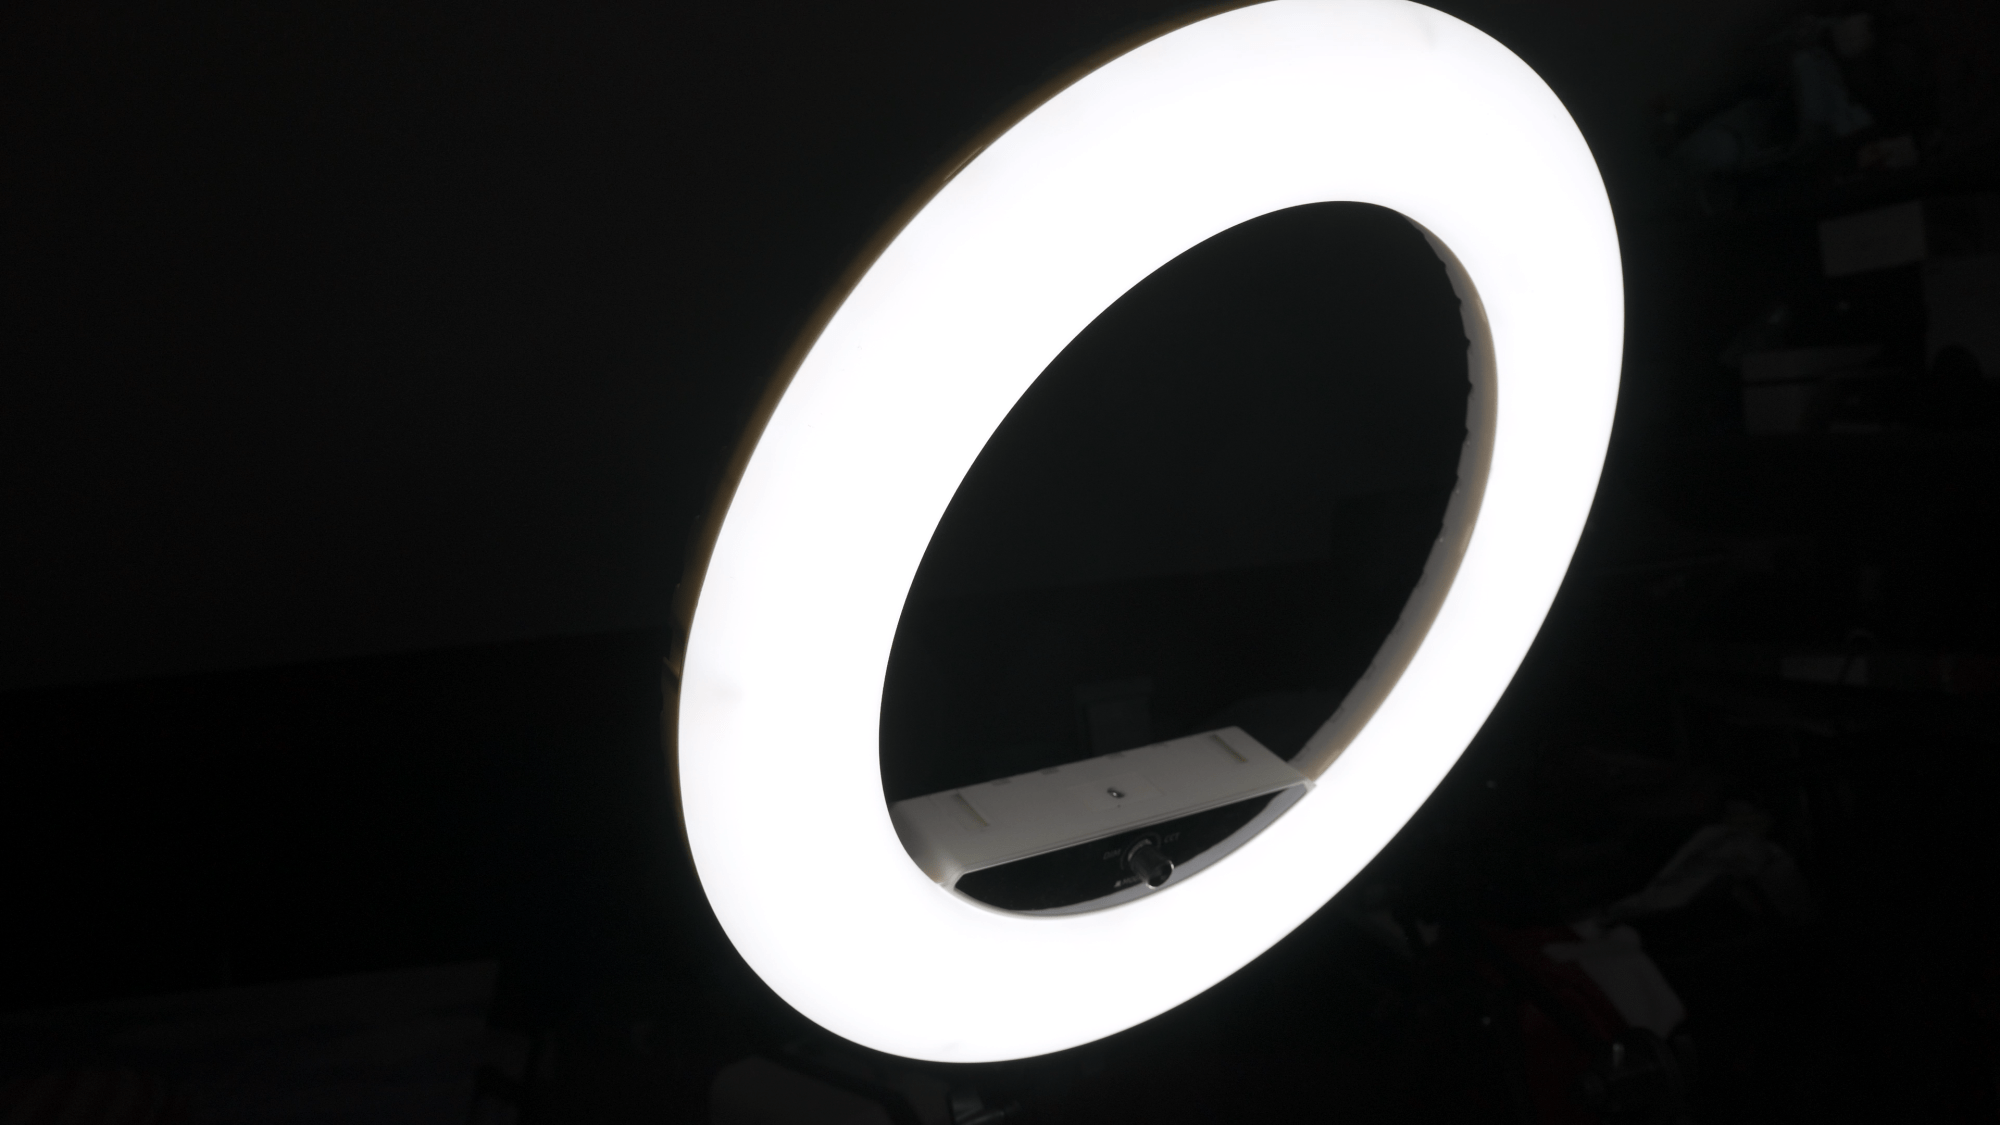
2. Best Budget Artificial Light: The Ring Light
If you’ve got a small budget, your first investment should be a ring light.
Why ring lights are great for beginners:
- In the $25–$50 range, you can find solid mid-range options.
- They work perfectly with phones or cameras.
- Many include adjustable color temperature and brightness.
- You can mount your phone in the center for consistent, flattering lighting.
Here are a few budget option from amazon:
I personally use a large ring light that cost around $150, and it’s mostly the only main light I use for my videos. It’s adjustable, sturdy, and long-lasting.
Note: Ring lights produce a distinct ring-shaped reflection in your eyes. Some people love it, some don’t—just something to be aware of.
3. Consider a Softbox Light for Diffused Lighting
Another great option is a softbox light, which produces soft, even lighting and eliminates harsh shadows.
Softboxes come in various styles, with features like:
- Dimmable settings
- Adjustable color temperature
- LED bulbs
- Different sizes and stands
Here are a few options from Amazon:
The closer the softbox is to your face, the better the lighting. If it’s too far away, you’ll need to raise the brightness, which can light up your whole room—not ideal for talking head videos. That said a soft box can hardly be directly in front of you otherwise it covers the camera.

Between budget ring lights and budget softboxes, ring lights are generally more versatile—especially for creators using a phone.
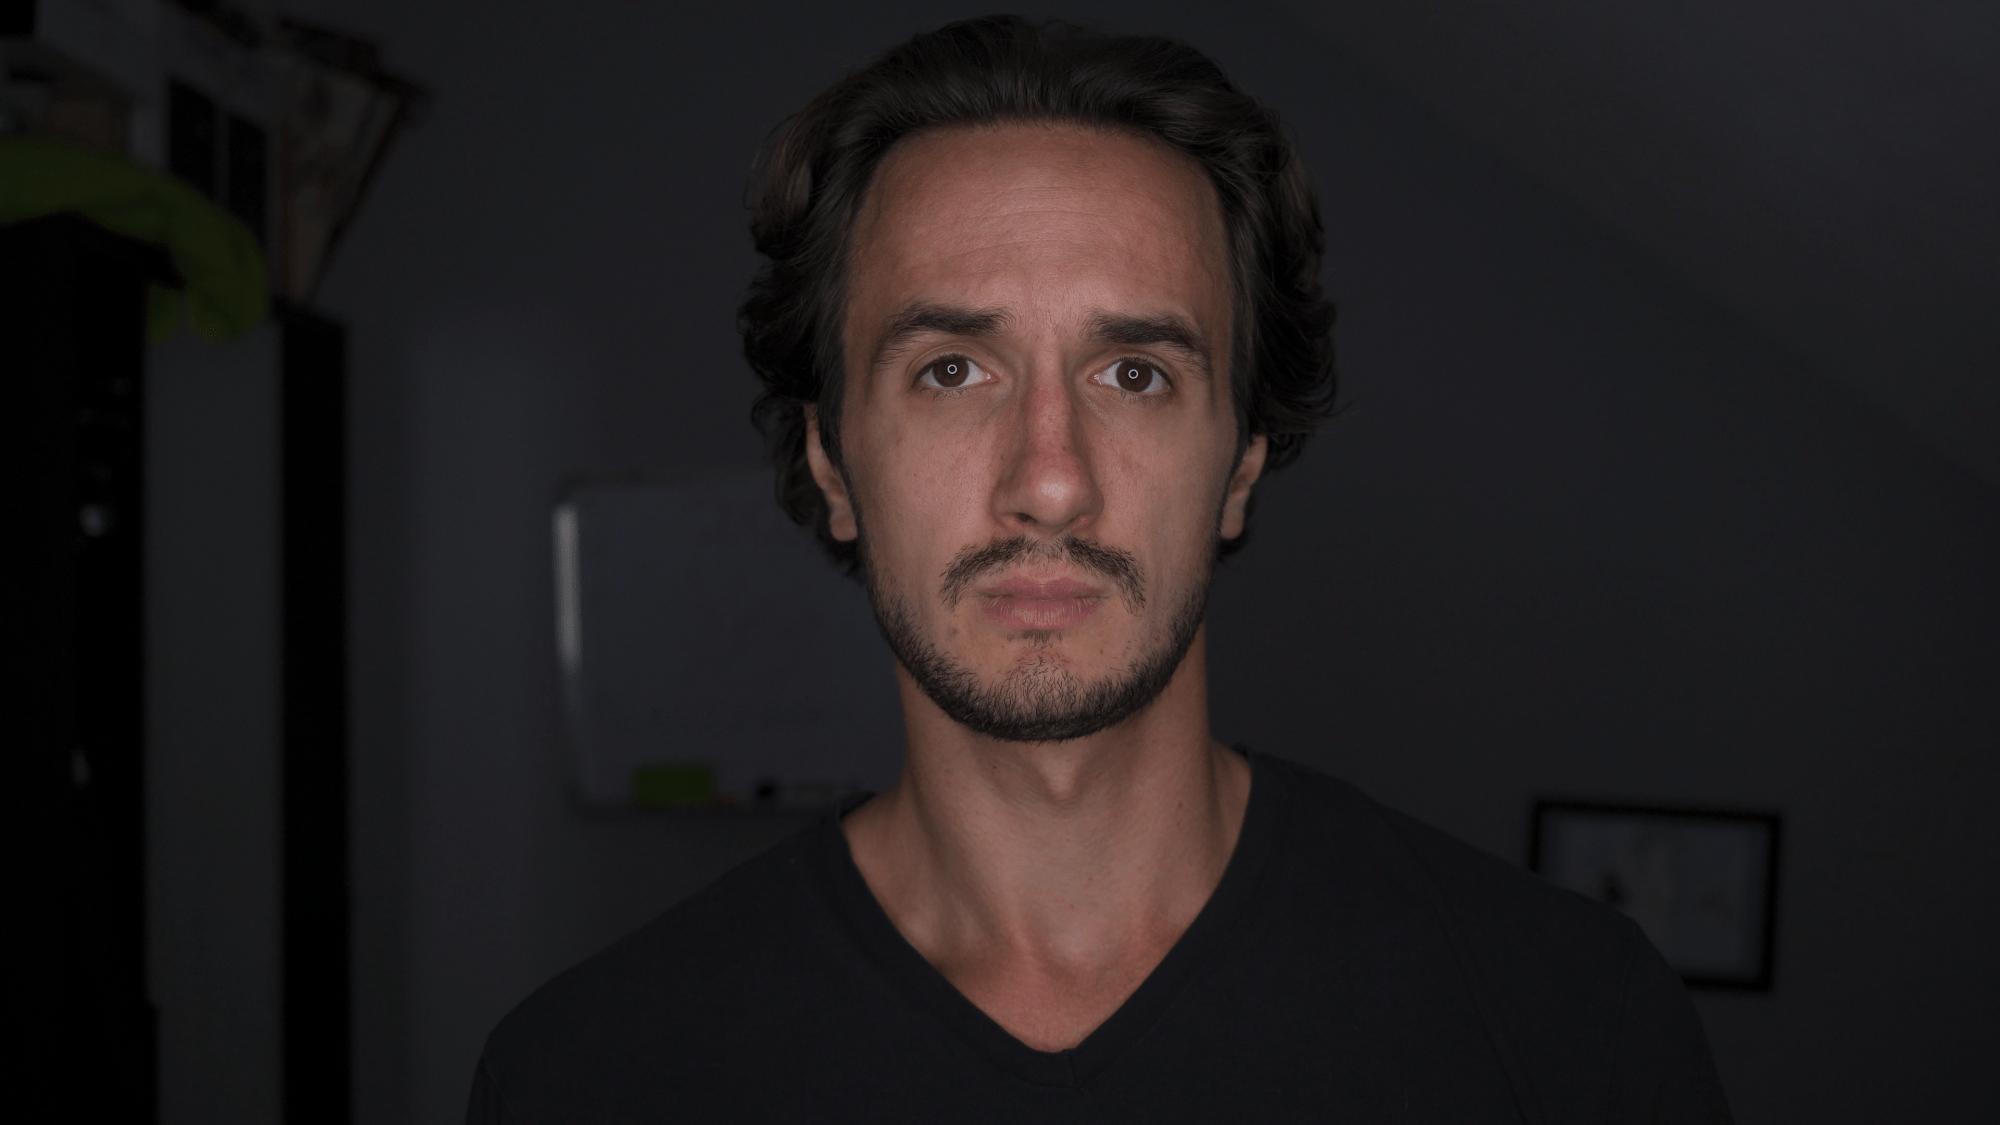
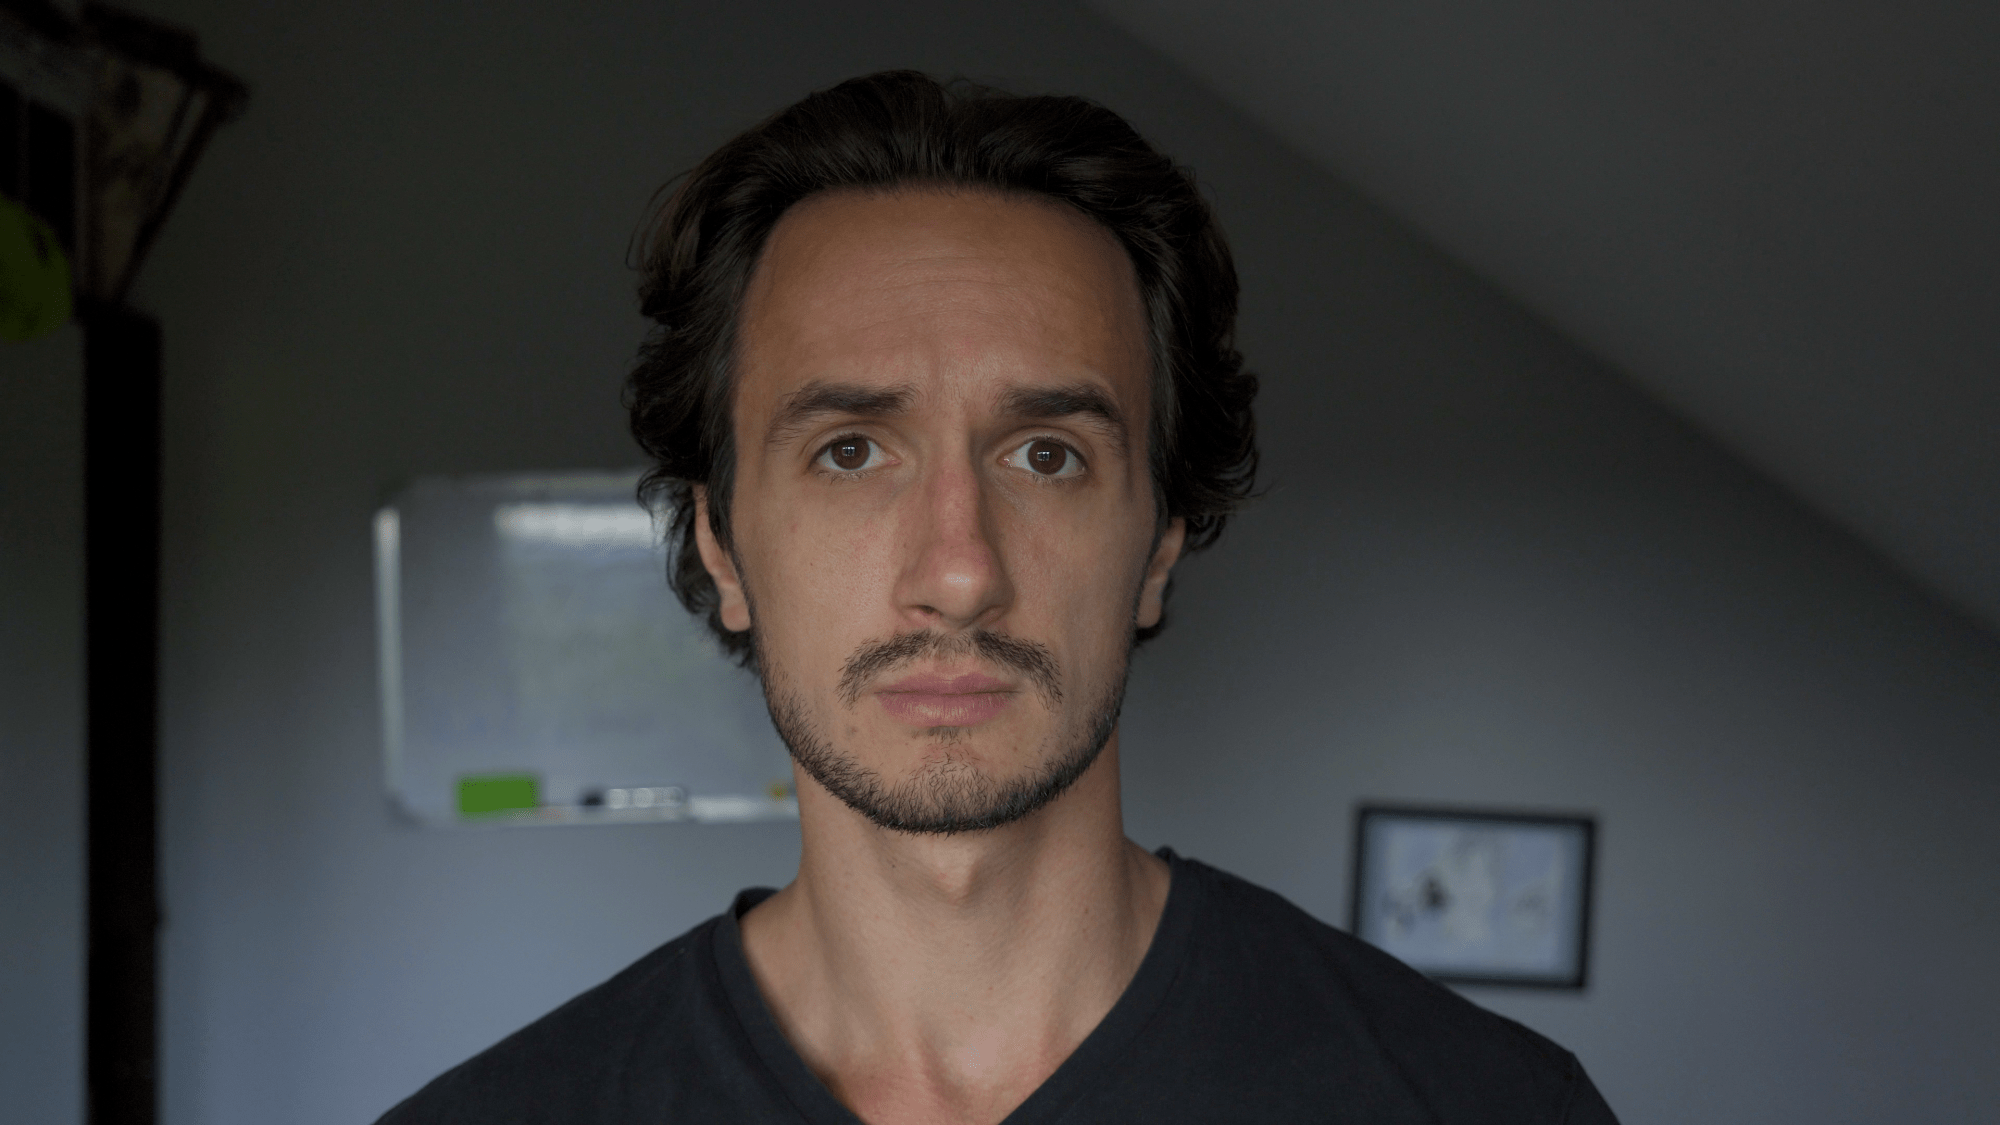
Here is a comparison between natural light, ring light and softbox light on face:


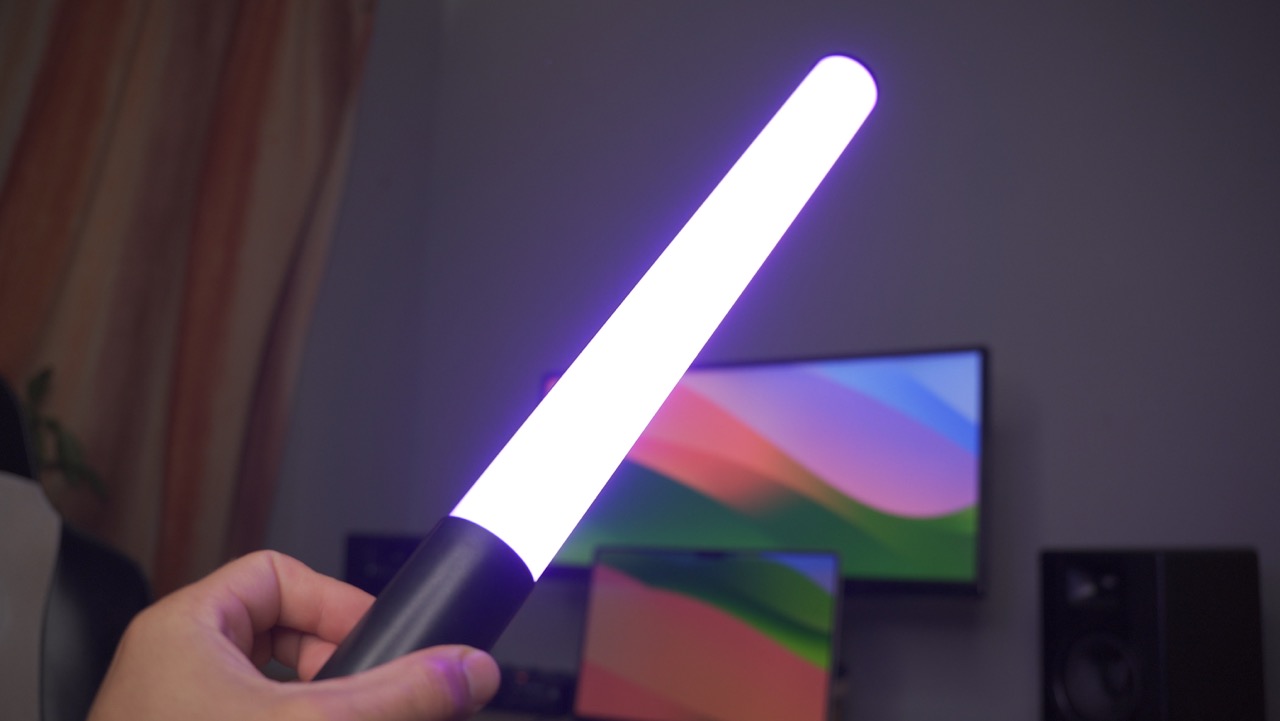
4. Add an RGB LED Blade for Creative Background Lighting
My favorite practical light to use is an RGB LED blade light. It can be used to paint a plain wall to any color, have it in the background somewhere and it’s small and easily portable so you can take it as a key light for your travels in case you need to shoot something.

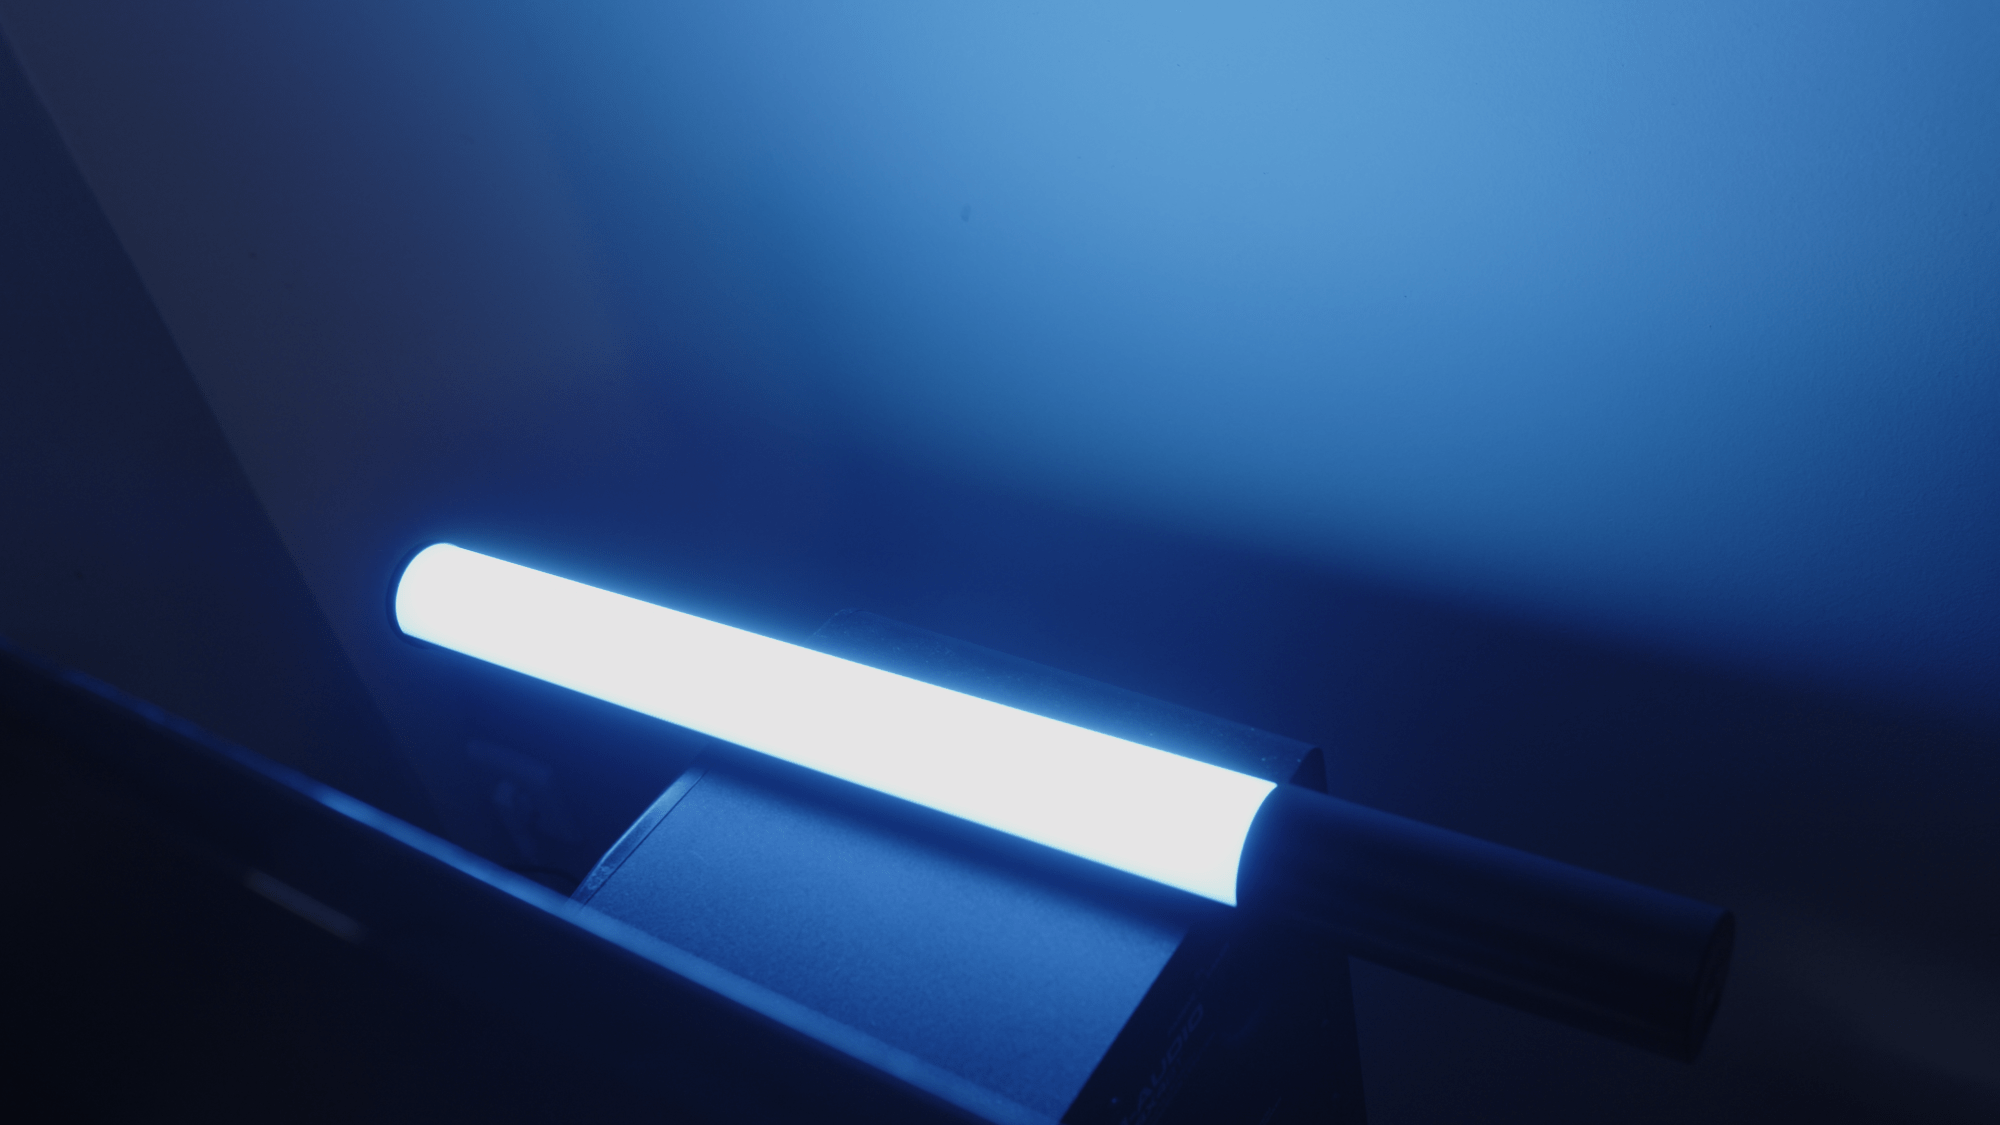
It saved my life recently when I had to shoot a quick video on my holiday and I mean you can take a look at the result in this image. The practical light in this case was lamp on the wall. Very simple setup but a professional look.

You can find great options for around $30 on Amazon. I’m using this one. These small lights are:
- Portable and mountable
- Bright and dimmable
- Color adjustable
- Equipped with special effects modes
Use them to:
- Add a colorful rim light around your shoulders
- Light up your background
- Bring depth and interest to otherwise plain shots
It’s a fun and creative way to level up your content’s visual quality—without spending a ton.
6. Background Lighting: Practicals for Vibe and Depth
You don’t need fancy lights for your background. A few inexpensive options include:
- Lamps
- Candles
- RGB light strips
- Standing floor lamps
The goal is to create atmosphere and separation between you and your background. A warm lamp or a colored light can make a huge difference in how polished your video feels. A good example is my shot above with the wall lamp in the background.
Quick Recap: Budget Lighting Setup Recommendations
| Purpose | Gear | Price Range | Why It’s Great |
| Key Light | Natural Light | Free | Soft and flattering on cloudy days |
| Key Light | Ring Light | $25–$150+ | Beginner-friendly, adjustable, compact, diffused |
| Key Light | Softbox Light | $40–$100+ | Soft, professional look with diffused light |
| Effect Light/Key Light | RGB Blade Light | ~$30 | Adds color and creativity to background |
| Background | Practicals (lamp, strip light) | Free–$20 | Adds style and depth to scene |


You must be logged in to post a comment.